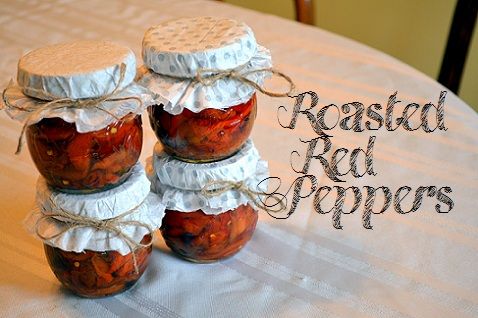
Fall is the most wonderfully gorgeous, BUSY season of the year. In Wisconsin, where we have a relatively shorter growing season, it's the time of year that everything seems to be ready to harvest, and for my family, ready to can and preserve.While red bell peppers are fantastic fresh, roasting and preserving them during the fall months makes for a ten-minute-meal later. They store for about five months, and are cheaper than the store alternative, without harmful preservatives.The process is even relatively simple.
 When I purchase or harvest red bells for roasting, I try to at least work with a bushel at a time. The last bushel and a half we made, turned over seventeen of the eight ounce jelly jars, so plan accordingly for the amount of jars you want to make up.
 Prior to grilling your peppers, it is necessary to thoroughly wash your peppers in water, as it may spoil your peppers to try and wash them once they have been grilled.
Your goal when you grill the peppers is to get their skin black, charred, and wrinkly. The idea is to make the skin easier to peel off so you mare left with the softer inside.
SIDE NOTE: You can also peel the skin off, and serve with lemon, garlic, salt, and parsley for a yummy side dish too, if you decide you would rather do that than can them.
After you have grilled up all of your peppers, allow them time to cool so they are easier to handle. I allow them to sit in a food grade bucket or bowl and bring them indoors in a cooler area of the house. Try to avoid leaving them at room temperature or in full sunlight during this time.
 Once cool, it is now time to peel your peppers. You can lay out newpaper to catch the peels on, but do not allow the portions you are keeping to touch newspaper ink. The peel should come off easily and leave the bright red pepper beneath it. You should also remove the stem and seeds at this point. It is best to look the inside and outside of the pepper over at this point for bad spots where pests may have gotten into the pepper, and spots where the pepper just doesn't look all that appealing. You can simply cut away those spots and utilize the rest of the pepper.
 I also try to avoid keeping any parts of the pepper that is still hard and not thoroughly roasted. I keep all the peeled peppers in their own bowl until its time to fill your jars, as they make their own juice.
 SIDE NOTE: The last batch of red peppers we made had a pH of 4.9. Clostridium botulinum,
the bacteria that causes botulism, thrives in a pH higher than 4.6,
Meaning that you can either pressure cook your peppers to kill the
bacteria, or you can decrease the pH, which is what my family does, you will see how that's done in a second.
SIDE NOTE: The last batch of red peppers we made had a pH of 4.9. Clostridium botulinum,
the bacteria that causes botulism, thrives in a pH higher than 4.6,
Meaning that you can either pressure cook your peppers to kill the
bacteria, or you can decrease the pH, which is what my family does, you will see how that's done in a second.Your goal when filling the jars, is to leave enough room that you can pour lemon juice on top of your peppers, and have it reach the peppers at the bottom, but still get as many peppers into a jar as will fit.
The picture on the left is an ideal fill level for your peppers.
 Once you have filled your jars to the appropriate level, you are going to add lemon juice. Why? Lemon juice has a pH of 2, making it a fairly strong acid. A single tablespoon of lemon juice will lower your pH enough to bring it to a botulism-free pH. I find that it really doesn't heavily impact the flavor, and it keeps you safe from spoiling your food.
 I pour a tablespoon per jar, and allow the jars to sit for 15 minutes. During this time, you can begin boiling the lids to your jars. It is important to always use new lids every year, as after the first year of sealing your jars, you can't guarantee they will hold up to the process again. Follow the instructions on the box for boiling time and technique, and be sure to put the lids on the jar while the lids are still HOT. You can buy canning kits like this that are relatively inexpensive and have the magnetic lid grabber for avoid burning yourself while putting lids on your jars.
Once the lids are on good and tight, you can put all of your jars in a pan filled with water. Put the pan on high heat, and bring to a raging boil. Allow to boil for twenty minutes, and your jars are complete.
This completes the process for the Roasted Red Peppers. Look Out for a recipe on how to cook them.